Digitech RP-10 UPGrade/nadgraditev
![]()
![]()
1.BACK
UP user presets to sysex file with program
MIDIOX and function MIDI
DUMP,arhiviranje naših nastavitev v sysex datoteko s programom ![]() z funkcijo MIDI DUMP.
z funkcijo MIDI DUMP.
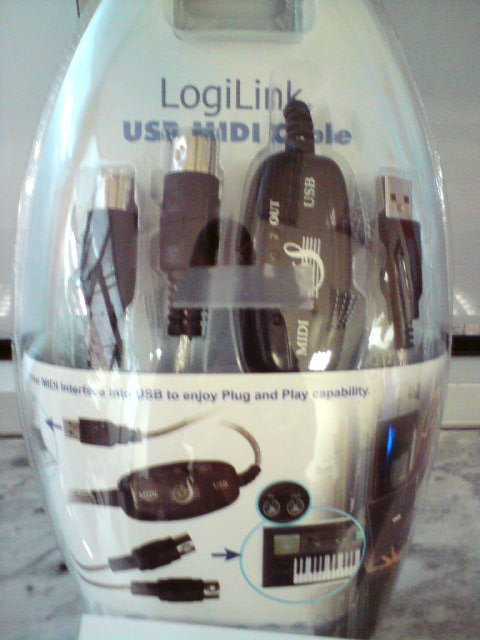
Priključimo
oba MIDI kabla (MIDI IN,MIDI OUT) s PC-jem ki ju poveževo
z MIDI-USB
vmesnikom in vklopimo efekt.Na PC-ju ne smemo
pozabiti nastavitve (MIDI devices) USB-MIDI device
ali podobno.
Shranili
bomo kompletne podatke,vse nastavitve.Pozneje,ko bomo
zamenjali eprom z vsebino 2.0. jih bomo preko MIDI
povezave spet vstavili v RP10.
Connect both MIDI cable (MIDI IN, MIDI OUT) to a PC by with MIDI-USB interface and set the effect. On the PC, we can
not forget the settings (MIDI devices) USB-MIDI device or same.
We will save the complete data settings. Later, when we replace the EPROM with the contents of 2.0. we will return via MIDI connections loaded in RP10.

RP10 se
postavi na prvo lokacijo,kjer smo shranili svoje nastavitve,npr 0….100.
RP10 is placed at the first location where we saved your settings, such as 0 ... .100.

Pritisnemo
tipko MIDI da dobimo vsebino ekrana,kot nam prikazuje slika.
Press the MIDI button to obtain the contents
of the screen, as shown in figure.

Pritisnemo
tipko desno trikrat.
Press the button right three times.

Na
zaslonu dobimo sliko.
On display we get
figure.

Pritisnemo
tipko 2.
Press the button 2.

Na
zaslonu dobimo sliko. MIDI podatki (naše nastavitve) se pošiljajo v naše okno v
programu MIDIOX. Ne smemo pozabiti odpreti okna receiving
the sysex.
On the screen we get the picture. MIDI data (our settings) are sent to our window in the
program MIDIOX. Do not forget to open the window Receiving sysex.

Na
zaslonu PC-ja dobimo MIDI podatke v hex kodi,okence
na desni strani.Vsebimo podatkov shranimo kot sysex datoteko npr.RP10arhiv.syx.
On PC screen we get MIDI data in hex code see the right window. Content of data we
can store as sysex file, for
example. RP10archive.syx.

2.Menjava
EPROM-a,dobimo ga tukaj.Changing the EPROM, we get it here.
Odvijemo
spodnji del RP10 da dobimo EPROM na levi strani.
Unscrew the bottom of the RP10 we get EPROM on the
left side.

S klešči potegnemo EPROM iz podnožja,kot kaže slika.
With forceps pull the EPROM from the socket, as shown on figure.

Napis na
EPROMu mora zgledati
takole,takrat vemo da imamo pravega,lahko si pomagamo z tiv
oznako U42.
The label on the EPROM should look like this, then we know that we have the right one,you can help with pcb sign U42.

Vstavimo
prejeti EPROM RP10 verzija 2.0. Ko smo ga vstavili v
podnožje ga pritisnemo po celi dolžini,da sedejo pini
do konca podnožja.
Insert the EPROM RP10 version 2.0. Once we have inserted in the socket press the whole
length,pins have to sit to the
end of socket.

Naš novi
eprom je vstavljen v podnožje.Sedaj
imamo OS 2.0. Ob vklopu se bo RP10 resetiral in
zgubili bomo vse svoje nastavitve.
Our new EPROM is inserted into the socket. Now we have OS 2.0. When we turn the RP10 on will do the hard reset and we'll lose all our settings.

3. Povrnitev naših nastavitev v RP10,ki smo si ji shranili še pred
menjavo EPROMa. Restore our setting in RP10, which we saved it before changing EPROM.
Spodnjo
stran privijemo na ohišje efekta in vzpostavimo povezavo z PC-jem. Naložili
bomo svoje nastavitve,ki smo si jih prej shranili.Pritisnemo
MIDI gumb in gumb za desno enkrat.Dobimo naslednjo sliko.Sedaj je naš RP10
Pripravljen
da sprejme podatke,naše nastavitve.S programom MIDIOX
odprite okno send sysex,naložite
shranjeno datoteko in program bo preko MIDI povezave poslal vse nastavitve v RP10.Vmes se lahko spreminja
display in dobivamo čudne karakterje,naj
nas to ne moti.
Screw on the lower side of the housing RP10 and connect to your PC. We will upload our settings, which we previously saved. Press the MIDI button and button
right once. We get this picture. Now is our RP10 ready to accept data, our settings. With MIDIOX open window
send sysex,load saved file and the program will sent via MIDI connections all the settings in the RP10. In the
meantime, the display
will change weird characters,do not mind about it.


Ko se
MIDI prenos zaključi imamo spet svoje nastavitve.
When the MIDI download is completed, we get our settings
back.

Ker je še
vedno kar veliko povpraševanje po nadgraditvi RP10 smo objavili postopek kako
nadgraditi RP10. Z vsebino OS ver. 2.0 dobite kar nekaj novih funkcij (spominske
lokacije)in novih efektov.
Since it is still quite a lot of demand for upgrade RP10 we published procedure how to upgrade
the RP10. The contents of OS ver. 2.0 you get quite a few new functions
(memory locations)
and new effects.

Opozorilo:AudioLogs ne odgovarja,da ne bo prišlo do napake med postopkom ali
za škodo ki se lahko zgodi. Preden se lotite menjave ERPOM izključite RP10 iz
omrežja. S posegom v RP10 lahko poškodujete vezje. Bodite previdni pri menjavi
ERPOM-a,ker lahko poškodujete podnožje. Če tega posega niste vešči naj za vas
to opravi strokovnjak.
Warning: AudioLogs is not responsible, that there will be no errors during the procedure or damage that may occur. Before you replace ERPOM disconnect RP10 from the network. By intervening in RP10 could damage the circuit. Be careful when changing ERPOM because they can damage the socket. If you are not skilled in this practice
should be done for you an expert.
AudioLogs,June2012,info@audiologs.com
If the information was useful for you, you can